A Trustworthy PCB and Electronic Manufacturing Enterprise! Contact Us


Before circuit cards are assembled, they are boards, however, the PCB manufacturing process involves many different steps.These are outlined in this explainer article, including what happens during each step of the process. This will give you an overview of the entire process and a better understanding of how each stage affects the quality of the final product.
What is a PCB circuit board?
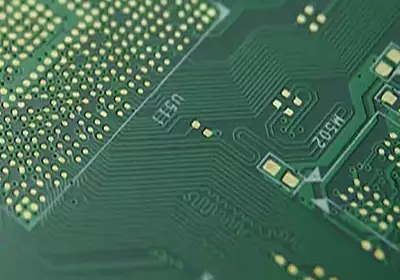
PCB, short for printed circuit board, is an electronic circuit board that is made of a substrate, copper circuits,and other components used to connect and control electrical signals or power.
PCB boards hold these components in place and enable them to work together.These include small electrical components such as resistors,capacitors,inductors,and transistors,as well as larger components such as integrated circuits (ICs) and microprocessors.
PCBs are produced through an intensive manufacturing process involving many steps.This remains the most important part of PCB manufacturing,as it will determine the functionality and lifespan of the board. Below, we take a look at what happens when a PCB is manufactured.
PCB Manufacturing Process Step by Step
In this step-by-step guide, we will discuss the typical PCB manufacturing process and how each stage plays a role in producing a high-quality product. We will also discuss some of the different processes available in the PCB production process.
Step 1: PCB Design
PCB design refers to the process of creating a representation of a PCB. An engineer or engineers use CAD software to create a design that includes routing and component placement, as well as all other necessary components of the board. The design phase generally includes the following:
• PCB schematic
• PCB layout
• PCB component planning
• PCB routing
• Designing the board
• Exporting PCB Gerber files
Step 2: PCB printing
Once the design has been uploaded to the manufacturer's system, the next stage is printing. This is the first stage of actual PCB manufacturing. The events that will occur during this step are as follows:
• A "negative" image of the PCB design is printed on a film
• Black ink is used to represent copper traces, and clear ink is used to represent other non-conductive areas
• The outer layers are the opposite: clear ink is used for copper traces, and black ink is used for non-conductive areas
• The film is then used to create a photoresist mask, which is placed on the PCB panel.
• This mask will become a guide for the subsequent etching process
• Next, the board is exposed to a beam of ultraviolet light
• This causes the polymer on the photoresist mask to harden and become insoluble, but only in the areas where the ink was transparent. This copies the circuit layout onto the PCB copper layer
• The PCB is now ready for etching
Step 3: PCB Etching
Etching is one of the most important steps in the PCB manufacturing process. It involves exposing the copper layer to a chemical solution, which removes any copper that is not part of the design. Here is what happens during this step in the PCB etching process.
• The PCB board, coated with a photoresist mask, is immersed in the chemical solution.
• The chemical reaction removes the unwanted copper from the board, leaving only the desired traces and paths.
• Once this process is complete, the remaining copper is cleaned to remove any residue or contaminants.
• Now that the PCB has the desired copper traces and paths, it can move on to the next stage of the process.
Step 4: PCB Layer Alignment and Bonding
PCB layer alignment involves ensuring that all the layers of the board are properly aligned and ready to be laminated together. This is done by using a specialized machine called an optical puncher.
• The machine uses a beam and pins to precisely align the layers.
• The board is inspected for any defects or discrepancies using an optical inspection machine (AOI).
• The machine checks the board against the original CAD design to identify any issues that need to be corrected.
• Once the alignment and inspection is complete, the layers can be bonded together
Step 5: PCB Drilling
The board will now go through the drilling process. PCB drilling is done to create the necessary holes for mounting components, passing wires, or connecting successive layers. This part of the PCB manufacturing process requires a great deal of accuracy and precision, as mistakes can be costly:
• X-ray equipment is used to pinpoint the exact location of the holes.
• Special CNC drilling machines are then used to drill these points
• The first holes to be drilled are the pilot holes, as they act as guide holes to hold the board in place.
• Once the PCB drilling is complete, all excess material is removed to ensure a clean board for the next stage.
Step 6: PCB Plating
The PCB plating process is used to cover the exposed holes on the PCB with a copper conductive layer. This is done so that electrical current can easily pass through the board without any issues. The PCB plating process involves immersing the board in a series of chemical baths.
• The PCB board is thoroughly cleaned
• Next, the board is immersed in successive chemical baths
• These deposit layers of copper onto the board.
• This is usually a computer controlled process to ensure accuracy and consistency
• Finally, the board is rinsed with water to remove any residue from the chemicals used.
Step 7: Printing and Etching the Outer Layers of the PCB
To create the outer layers of the PCB, an etching process is used. Etching involves using a chemical solution to remove the unwanted copper on the board, leaving behind the desired traces and paths.
• The PCB panel is coated with a thin film of photoresist and has been printed with the desired design.
• The board is then exposed to UV light
• This causes the photoresist to harden in areas that must not be dissolved
• The board is then immersed in a chemical bath
• This etches away the unwanted copper traces
Step 8: PCB Solder Mask
Once all of the above PCB manufacturing steps have been completed, it is time to apply the solder mask. This is a thin layer of protective coating applied to the board. The PCB solder mask helps protect the exposed copper traces from any damage and corrosion, and provides insulation between components.
• The PCB is cleaned to remove any residue
• A liquid solder mask is then applied to the board, which is usually green or blue in color.
• Small holes are made in the solder mask to indicate the areas where soldering will take place
• The PCB is then cured in an oven to ensure that it adheres firmly to the board.
Step 9: PCB Silkscreen
PCB silkscreening involves applying a thin layer of ink to the board to mark components and paths, making them easier to read during inspection. This layer also prints the company's logo, warnings, etc.
• Special inkjet printers are used
• The design to be printed is then loaded onto the printer
• Depending on the design of the PCB, the silkscreen can be in a single color or in multiple colors.
Step 10: PCB Finishing
PCB manufacturers will apply the surface finish based on the customer's preferences. Most of the time, the type of PCB finishing depends on the design and the end-use application. Cost and reliability also come into play when choosing the surface finish. PCB finishing options include:
• Immersion Silver
• HASL (Hot Air Solder Leveling
• ENIG (Electroless Nickel Immersion Gold),
• OSP (Organic Solderability Preservative)
• ENEPIG (Electroless Nickel Palladium Immersion Gold)
• Immersion Tin
• Gold
Before completing the production process, the board also undergoes various analysis or finishing steps. This includes routing and V-rating or both.
Step 11: PCB Quality Inspection
During the PCB quality inspection process, the manufacturer conducts a series of inspections and tests. The purpose of PCB inspection is to ensure that the board meets all design requirements, including specifications and tolerances.
PCB testing, on the other hand, is used to measure the performance of the board.Essentially,the board is inspected using manual and automated techniques and equipment.
Overall, manufacturers use quality inspection steps to ensure that various PCB standards, both internal and external, are met.
Step 12: PCB Packaging
Finally, the finished and tested PCB is packaged. PCB packaging involves the use of appropriate materials such as anti-static bags, bubble wrap, and boxes to ensure that the board is safely protected during transportation.
That's it! This is what goes on behind the scenes to ensure your PCB board manufacturing design becomes a reality.
Note that in addition to PCB manufacturing services, some companies also perform circuit card assembly upon customer request. This process follows all of the previous steps but includes steps such as component placement and soldering.
