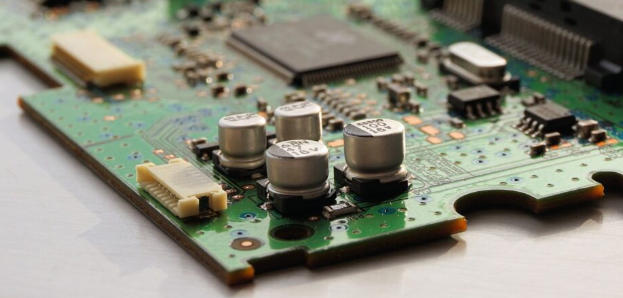
PCBs are essential components in modern electronic devices. PCBs are conductive patterns formed on an insulating substrate, providing a foundation for connecting electronic components. This article details the installation (i.e., connecting and securing) of PCBs. Covering everything from basic knowledge to practical steps, it's easy for even beginners to understand. Installation is a crucial step in electronics and product development. Learning the correct method helps prevent malfunctions and ensure stable operation.
PCBs are made of materials such as glass epoxy and FR-4. A copper foil pattern is etched onto the surface of the board, to which the electronic components are soldered. Mounting refers to securing the PCB to a housing or frame. The purpose of mounting is to protect the board from vibration and shock and to promote heat dissipation. Mounting methods vary depending on the size and shape of the PCB. For example, small PCBs are typically secured with screws, while larger PCBs use rails or brackets.

pcb
When considering PCB installation, first consider the environmental conditions. In hot and humid environments, choose heat-resistant mounting materials. Also, ensure good grounding to prevent electromagnetic interference (EMI). Searching for the keyword "PCB installation" will yield numerous resources.
Mounting Types and How to Choose
There are several ways to mount printed circuit boards. The main methods are as follows:
Screw mounting: This is the simplest method. Drill holes in the PCB and then secure it to the enclosure using standoffs or spacers. The standoffs provide clearance between the PCB and the enclosure to prevent short circuits. Adjust the torque during installation and be careful not to damage the PCB.
Snap-on mounting: Commonly used in plastic enclosures. Simply snap it onto the edge of the PCB. It's quick and tool-free, but not suitable for high-vibration environments.
Rail mounting: The PCB is secured by sliding it along a DIN rail-like rail. This method is common in industrial equipment and allows for easy replacement. A groove must be machined into the edge of the PCB.
Adhesive mounting: Attaches using epoxy glue or double-sided tape. Suitable for lightweight boards, but be careful about peeling due to differences in thermal expansion. After installation, allow sufficient time for the mount to cure.
The choice of mount depends on the specific application. For example, in automotive electronics, screw mounting is preferred due to its high vibration resistance, while snap-on mounting is more suitable for prototyping. Copper or aluminum spacers are recommended as mounting materials for printed circuit boards.
PCB Installation Procedure
Here, we'll explain the installation steps using a screw mount as an example. Required tools: Screwdriver, standoffs, screws, and a drill bit (for drilling holes).
Preparation: Review the printed circuit board design to determine the mounting hole locations. The hole diameter should match the screw size, typically M3 or M4. If components are already mounted on the board, select a location that will not interfere with them.
Drilling: Drill holes in the printed circuit board. Use a drill bit appropriate for the board material. For glass epoxy, a hard drill bit is recommended. After drilling, remove any burrs and sand the surface.
Bracket Mounting: The bracket is secured to the bottom of the enclosure with screws. The standard height is 5mm to 10mm, matching the height of the components on the board.
PCB Mounting: Place the PCB on the bracket and tighten the screws. The torque is approximately 0.5 Nm. Be careful not to overtighten. After mounting, check that it is level. Testing: Connect the power supply to confirm normal operation. Perform a vibration test to check for looseness.
Mounting the PCB in this manner ensures a stable installation. Beginners should start with a practice kit.
Precautions and Troubleshooting
Common mistakes when installing PCBs include misaligned holes and overtightening. This can cause the board to crack or patterns to peel off. To avoid this, we recommend using CAD software for simulation beforehand. Additionally, always take anti-static measures. Before installation, ground the board and place it on an anti-static mat.
Thermal management is also important. If the PCB contains high-heat-generating components, use a heat sink in conjunction with the mounting material. Installing a cooling fan after installation can extend the life of the components.
Problem Example: If signal noise occurs after installation, it may be caused by a ground loop. Strengthen the grounding at the mounting points on the PCB.
PCB Mounting Application Examples
In home electronics, the PCB of an Arduino board is mounted in a 3D-printed housing. In the industrial sector, PLC boards are mounted in a rack. In IoT devices, small PCBs are adhesively mounted in wearable device housings. These examples demonstrate mounting flexibility.
PCB mounting is key to improving the reliability of electronic devices. With the right techniques, it can be widely used for both DIY and professional applications.