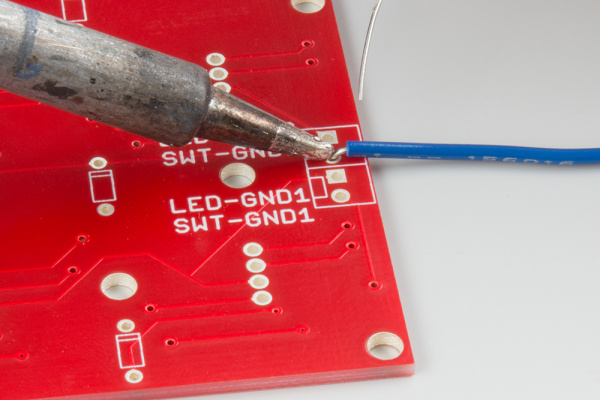
Soldering a wire to a printed circuit board (PCB) is one of the most basic yet essential skills in electronics assembly and repair. A good solder joint ensures stable electrical connectivity and mechanical reliability, while a poor joint can lead to intermittent failures, high resistance, or even complete disconnection. This guide will walk you through the entire process step by step, from preparation to inspection.
1. Tools and Materials You’ll Need
Before starting, make sure you have everything ready:
Soldering iron (30–60 W, with a fine or conical tip)
Solder wire (preferably 60/40 tin-lead or lead-free alloy)
Flux or solder paste
Tweezers and wire stripper
Helping hands or PCB holder
Multimeter (for final testing)
Heat-resistant mat and safety glasses
Having the right tools not only makes the work easier but also greatly improves soldering quality.
2. Preparation Work
Clean the PCB pad: Use isopropyl alcohol and a lint-free cloth to remove oxidation, dust, or oil on the solder pads. Clean copper pads help solder adhere evenly.
Prepare the wire: Strip about 3–5 mm of insulation from the wire end. If it’s a stranded wire, twist the strands tightly to prevent fraying.
Tin the wire: Apply a small amount of solder to the exposed wire. This is called tinning and helps improve heat transfer and ensures a more reliable bond when soldering.
Apply flux: Add a little flux on both the PCB pad and the tinned wire to promote solder flow and prevent oxidation during heating.
3. Soldering Steps
Heat the joint: Place the wire on the pad, and touch both the wire and the pad simultaneously with the soldering iron tip.
Feed solder: Once both surfaces are hot enough, feed solder wire to the joint (not directly to the iron tip). The solder should melt smoothly and flow around the wire and pad.
Remove heat: After a second or two, remove the solder wire first, then lift the iron gently. Allow the joint to cool naturally—avoid blowing air, as rapid cooling can create weak or dull joints.
Inspect the joint: A good solder joint should look shiny, cone-shaped, and cover the wire evenly without forming a ball or bridging nearby pads.

4. Common Mistakes to Avoid
Cold solder joints: Dull, grainy appearance caused by insufficient heating. Reheat and reflow the solder.
Excess solder: May cause short circuits. Use just enough to cover the wire and pad.
Overheating: Can damage the PCB or lift pads off the board. Keep heating time short (2–3 seconds per joint).
Dirty tip: Always clean the soldering iron tip with a wet sponge or brass wire between uses.
5. Finishing and Testing
After all joints are complete:
Clean off any residual flux using alcohol and a brush.
Visually inspect each joint under good lighting.
Use a multimeter to check for electrical continuity and ensure there are no shorts.
If needed, apply a small amount of conformal coating to protect the solder joint from moisture or oxidation.
6. Additional Tips for Better Results
Maintain a stable hand position using a stand or arm rest.
If the wire will bear mechanical stress, add strain relief using hot glue or cable ties.
Use temperature-controlled soldering stations to ensure consistent performance.
Practice on scrap boards before working on critical PCBs.
7. Conclusion
Soldering a wire to a PCB may seem simple, but precision and patience make the difference between a reliable connection and a future failure. With clean preparation, correct temperature, and proper technique, you can achieve professional-grade solder joints every time.
Whether you’re repairing a circuit, building a prototype, or doing DIY electronics, mastering this skill will serve you well in every project.