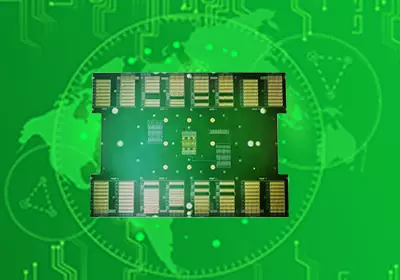
A Trustworthy PCB and Electronic Manufacturing Enterprise! Contact Us


A through-hlole is a microscopic conductive pathway drilled into a PCB to create an electrical connection between different PCB layers. Basically, a via is a vertical track on a PCB.
What is a through-hlole?
Before we delve into the via, I will briefly define what a PCB is. PCB is the art of transmitting signals under controlled parameters. Printed circuit boards are the basis for connecting components to each other. Its main purpose is to form electrical connections between active and passive components without interrupting or interfering with another signal or connection. So, the basic idea is to form a network of connections without conflicting with another connection. Therefore, a printed circuit board is a connection between components whose connections do not overlap with each other.

through-hlole
To achieve this standard, PCBs are made up of multiple layers. But how do these multi-layer boards connect to each other to establish electrical continuity? This is where vias come in. Vias are tiny conductive tunnels that connect different layers of a PCB, allowing signals to flow through them. Before designing a circuit, it is important to understand the capabilities of the manufacturer.
Aspect Ratio of through-hlole in PCB
The aspect ratio (AR) is a parameter that determines the reliability of a PCB. Before discussing vias further, let us first understand the concept of aspect ratio. Aspect ratio is the ratio between the thickness of the PCB and the diameter of the drilled hole.
Aspect ratio (via) = (thickness of the PCB) / (diameter of the drilled hole).
Since microvias do not protrude the entire board, the aspect ratio will be.
Aspect ratio (microvia) = (drilled hole depth) / (drilled hole diameter)
Aspect ratio plays a prominent role in the electroplating process during PCB manufacturing. The plating solution must flow effectively within the drilled hole to achieve the desired copper plating effect. Small holes compared to the thickness of the board will result in uneven or unsatisfactory copper plating. The larger the aspect ratio, the more challenging it is to achieve reliable copper plating within the via. Therefore, the smaller the aspect ratio, the higher the reliability of the PCB. At iPCB, we offer microvias with an aspect ratio of 1.5:1.
Micro via Aspect Ratio Chart

Different Kinds of Vias in PCB
Types of Vias
There are different types of vias drilled in PCBs depending on their function.
Via--The hole goes through from the top to the bottom layer. Connections are made from the top layer to the bottom layer.
Blind vias - holes that go out of an outer layer and end in an inner layer. The hole does not penetrate the entire board but connects an outer layer of the PCB to at least one inner layer. It is either from the top layer to a middle layer or from the bottom layer to a middle layer. Once lamination is complete, the other end of the hole is not visible. Hence, they are called blind vias.
Buried vias (hidden vias) - these holes are located in the inner layers and have no path to the outer layers. They connect the inner layers and are hidden from view.
According to IPC standards, buried and blind vias must be 6 mils (150 microns) or less in diameter.
Microvias
Microvia Description
The most common vias are microvias (µvias). Microvias are laser drilled during PCB manufacturing and have a smaller diameter (as small as 4 mils) compared to standard holes. Microvias are implemented in high-density interconnect or HDI PCBs. Microvias are usually not more than two layers deep because copper plating inside these small holes is a tedious task. As discussed earlier, the smaller the diameter of the via, the higher the shot power of the plating solution should be for electroless copper plating.
Types of Microvias
Microvias can be divided into stacked vias and staggered vias based on their location in the PCB layers. In addition, there is a type of microvia called skip vias. Skipping layers means that they pass through a layer and have no electrical contact with that layer. The skipped layer will not form an electrical connection with the via. Hence the name.
Microvias improve electrical properties and also allow for miniaturization of higher functionality in a smaller space. This in turn provides space for high pin count chips in smartphones and other mobile devices. Microvias reduce the number of layers in PCB designs and achieve higher wiring density. This eliminates the need for through-hole vias. The miniature size and functionality of microvias in turn increase processing capabilities. Implementing microvias instead of through-holes can reduce the number of layers in the PCB and also facilitate BGA breakouts. Without microvias, you would still be using a large cordless phone instead of a sleek little smartphone.

Vias
Sometimes vias are covered by solder mask so that the vias are not exposed. This is known as tented via or covered via.
Now that we have a better understanding of vias, let’s take a look at the most important part, the via in pad. It is sometimes also called via-in-pad plating.
Via-in-pad or via-in-hole plating (VIPPO)
The increase in signal speeds, board component density, and PCB thickness has led to the implementation of via-in-hole. CAD design engineers have adopted via-in-pad or via-in-hole plating (VIPPO) along with traditional via structures to achieve routability and signal integrity requirements.
Via-in-pad vs Traditional Via
So, what is via-in-pad? Let me explain. In a traditional via, the signal line goes over the pad and then into the via. You can see this in the image above. This is done to avoid solder paste from seeping into the via during the reflow process. In via-in-pad, the drilled via appears just below the pad. To be precise, the via is placed inside the pad of the surface mount component.
Conventional Via and VIPPO Via
First, the via is filled with a non-conductive epoxy as per the designer’s requirement. After that, this via is capped and plated to provide conductivity. This technique reduces the length of the signal path, hence, eliminating parasitic inductance and capacitance effects.
Via-in-hole can accommodate smaller component pitches and reduces the overall size of the PCB. This technique is ideal for BGA footprint components and is an important part of PCB assembly.
To make things even better, the backdrilling process is implemented along with via-in-hole. Back drilling is done to eliminate signal reflections from the unused portion of the via. The unneeded via stubs are drilled to eliminate any form of signal reflections. This ensures signal integrity.
Vippo with Backdrill
Quick PCB Design Tips for Vias
Here are a few quick tips that you can consider when adopting through-hlole in your design:
1.Avoid blind and buried vias unless absolutely required in the design – these require more drilling time and additional lamination. This can increase the cost of the overall PCB.
2. Stacked and staggered vias - Choose staggered vias over stacked vias because stacked vias need to be filled and planarized. This process is time-consuming and expensive.
3. Maintain a minimum aspect ratio. This provides better electrical performance and signal integrity. At the same time, this also leads to lower noise, lower crosstalk, and lower EMI/RFI.
4. Implement smaller vias in high-speed designs because stray capacitance and inductance are reduced.
5. Always choose the simplest solution to meet your design needs. Reducing the complexity of the through-hlole will result in reduced turnaround time and manufacturing costs.
6. Non-conductive fillers are usually sufficient for signal routing needs and are more cost-effective. Therefore, it is best to use non-conductive epoxy whenever possible.
7. When you are routing high-speed signals, such as High-Definition Multimedia Interface (HDMI), it is best to utilize blind or buried vias to eliminate stubs.
8. Always use conductive fillers for thermally conductive or high-power through-hlole. Higher thermal conductivity will help with the heat dissipation required for high-power components.
9. When using filled vias, make sure the surface of the pads is flat after filling and that the components are placed horizontally to avoid tombstoning defects. A tombstoning defect is when one side of a component falls off the board during soldering.
10. Use vias on differential pairs - Differential pair routing requires equal lengths of wires to avoid differential delay skew. Differential skew is when one signal reaches the receiver earlier than the other. Avoid vias on differential pairs as much as possible. If one signal passes through a via, the other signal in the differential pair must also pass through a via. The number of vias on each line in a differential pair should be the same.
11. Vias for high-speed signals - Vias tend to introduce inductance and capacitance to a circuit. This property is usually negligible in lower frequency signals. When it comes to high-speed signals, vias can seriously affect signal integrity. Therefore, it is best to avoid using through-hlole on high-speed signals.