A Trustworthy PCB and Electronic Manufacturing Enterprise! Contact Us


Prototype PCB assembly refers to soldering electronic components onto a printed circuit board (PCB) manufactured for a prototype design. The main steps include: designing and manufacturing the PCB, soldering components onto the PCB according to design drawings, and performing functional testing to verify that the prototype functions correctly.
A PCB prototype is essentially an early sample of a product, intended to test design concepts and see if they are feasible. While most prototypes are only made to test basic user functionality, PCB prototypes also need to be functional to some extent because PCB prototyping is for testing the overall functionality of the design. During PCB prototyping, engineers can experiment with different PCB designs and manufacturing specifications to find the most effective one.
PCB assembly is a complex process involving many steps, but before you know how to do it, you need to understand what PCB assembly is. PCB stands for Printed Circuit Board. A printed circuit board is a flat panel on which electronic components are attached. These electronic components include resistors, capacitors, transistors, diodes, and integrated circuits (ICs).
Compared to mass-production PCB assembly, prototype PCB assembly has the following characteristics:
Low batch size: Typically single-piece or small sample sizes.
High flexibility: Design adjustments or component replacements can be made quickly.
Primarily for verification: Mainly used for functional testing, signal integrity verification, and reliability assessment.
Cost-sensitive: Due to the limited production of prototypes, high-cost but rapid assembly methods are typically employed.
Prototype PCB assembly plays a "bridge" role in the R&D process, connecting conceptual design with mass production, and is an indispensable step in hardware development.
Prototype PCB manufacturing and assembly includes PCB manufacturing, SMT surface mount technology, and DIP through-hole component manufacturing, each with its unique flow and key steps. The following is a brief introduction to the three processes, with explanations of each step to help quickly understand the entire assembly process.
PCB Manufacturing Process
Material Preparation: Prepare the PCB substrate and necessary materials.
Inner Layer Circuit Printing: Transfer the circuit pattern onto the inner layer copper foil.
Lamination: Lay the multilayer boards together to form a single board.
Drilling: Drill component mounting and via holes on the PCB.
Electroplating: Deposit metal on the hole walls to form electrical connections.
Outer Layer Circuit Etching: Remove excess copper foil to form the outer layer circuit.
Surface Treatment: Protect copper traces and increase solderability (e.g., tin plating, gold plating, etc.).
Solder Mask & Silkscreen: Apply solder mask to protect the circuitry and print component markings.
Testing: Check the electrical connections for correctness and ensure PCB functionality.
Finished Product Shipment: Qualified PCB boards are ready for delivery.

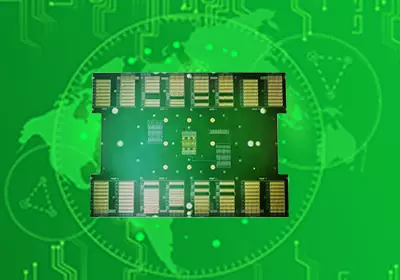
Prototype PCB assembly
SMT Manufacturing Process
PCB Cleaning: Remove dust and oil from the PCB surface to ensure soldering quality.
Solder Paste Printing: Print an appropriate amount of solder paste onto the pads to prepare for component placement.
Component Placement: Accurately place SMT components onto the pads using a pick-and-place machine.
Reflow Soldering: Heat the solder paste to solder and fix the components to the PCB. Cleaning (if required): Remove soldering residue and flux to ensure a clean board surface.
Inspection: Confirm mounting quality and solder joint integrity through AOI or manual inspection.
Finished Product Shipment: Deliver qualified SMT PCBs to customers or proceed to the next process.
DIP (Through-Hole) Process Flow
Material Preparation: Prepare necessary materials such as components, PCBs, and solder.
PCB Preparation: Check PCB hole positions and board material for compliance.
Component Insertion: Insert through-hole component leads into corresponding holes on the PCB.
Wave Soldering/Manual Soldering: Secure and electrically connect components using wave soldering or manual soldering.
Cleaning (if required): Remove soldering residue and flux.
Inspection and Testing: Check solder joint quality and perform electrical and functional tests.
Finished Product Inspection: Visually or through AOI check component installation for correctness.
Packaging and Shipment: Package qualified PCBs for shipment.
Common Considerations for Prototype PCB Assembly
Component Procurement Cycle
Prototype boards typically require rapid delivery, but some special components may have longer procurement cycles, requiring advance planning.
Material Selection
Prototype PCBs can use conventional materials such as FR-4 and CEM-1, but mechanical strength and thermal performance must be considered.
Small Batch Costs
Prototype PCB assembly costs are higher than mass production boards, mainly due to equipment start-up costs, labor costs, and testing costs. Reasonable control of quantity and complexity can help save costs.
Soldering Process Limitations
Soldering certain high-power components or large-size devices on prototype boards is difficult; process space must be reserved during the design phase.
Functional Testing Plan
The testing plan should cover electrical, signal, functional, and interface aspects to ensure sufficient verification of the prototype board's effectiveness.
Prototype PCB assembly is an indispensable part of the electronic product development process. It not only verifies the feasibility of the design but also helps engineers optimize circuits, debug software, and verify manufacturing processes.