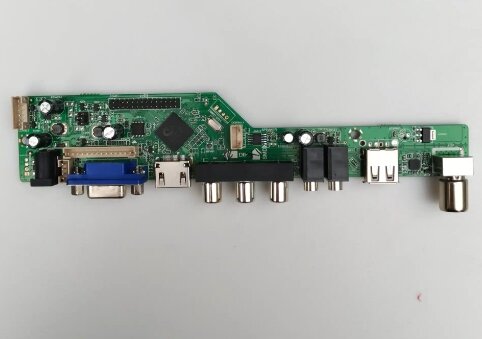
In today's world of rapid technological development, the importance of TV as the center of home entertainment is self-evident. However, even the most advanced technological products are not immune to failure. The TV PCB, especially the printed circuit board (PCB)on it, is the "brain" of the entire machine. Once a problem occurs, it often means that the TV cannot function properly.
1. Preliminary diagnosis: locate the source of the problem
When facing a TV that cannot be started or displays abnormally, the first task is to determine whether the problem lies on the TV PCB. Here are some basic diagnostic steps:
Check the power supply: Make sure the TV is properly connected to the power supply and the socket is working properly.
Observe the indicator light: The status of the indicator light on the TV can provide preliminary clues. If the indicator light is not on, it may involve a power supply problem on the power board or motherboard.
Troubleshoot external connections: Check whether external connections such as HDMI and AV cables are loose or damaged. Sometimes the problem may be with these interfaces.
Simple reset: Try to power off and restart the TV. Sometimes a simple reset operation can solve software-level problems.

2. Disassembly and inspection: Go deep inside the motherboard
Once you have determined that the problem may be related to the motherboard PCB, the next step is to disassemble the TV and inspect the motherboard directly.
Prepare tools: Make sure you have the right screwdriver set, anti-static gloves, precision tweezers, multimeter and other tools.
Safe disassembly: Follow the manufacturer's disassembly guide, carefully remove the back cover, disconnect all connecting cables, and mark the location to prevent confusion.
Visual inspection: Carefully inspect the motherboard PCB to look for any burn marks, swollen capacitors, broken solder joints or corrosion.
3. In-depth inspection: Use professional tools
For problems that are not easy to find with the naked eye, electronic testing equipment such as multimeters are needed for more in-depth inspection.
Voltage test: Measure the input and output voltages of key components to ensure that they are within the normal range.
Resistance and capacitance test: Check whether the capacitor is leaking and whether the resistance value meets the specifications.
Continuity test: Use a multimeter to detect the continuity of the circuit path and find possible breaks or shorts.
4. Repair or Replacement: Hands-on Practice
Based on the test results, you can decide whether to repair the existing motherboard or replace the entire motherboard.
Component Replacement: For damaged capacitors, resistors or integrated circuits, use new components of the same specifications to replace them. Pay attention to welding techniques and anti-static measures.
Circuit Repair: For open circuit or short circuit problems, you may need to re-solder or jumper repair.
Motherboard Replacement: If the motherboard is seriously damaged, consider purchasing a new motherboard of a compatible model for replacement.
5. Assembly and Testing: Verify the Repair Results
After the repair is completed, reassemble the TV according to the reverse process of disassembly and conduct a comprehensive test.
Connection Test: Make sure all cables are connected correctly without omission.
Function Verification: Power on the test to check whether all functions are normal, including image, sound, channel switching, etc.
Long-term operation: Let the TV run for a while and observe whether there are new faults.
The above is a simple repair tutorial for TV PCB. Welcome to contact iPCB for more information about TV PCB.