A Trustworthy PCB and Electronic Manufacturing Enterprise! Contact Us


What happens when a printed circuit board needs an upgrade or repair? Whether you are creating a new design or simply want to salvage useful components, understanding desoldering techniques is crucial; it facilitates hardware maintenance and enables significant modifications. Here, we will learn step-by-step how to desolder circuit boards.
What is PCB desoldering?
Desoldering is the process of removing soldered components and electrical connections from a PCB, allowing for the extraction of electronic parts or the replacement of components on an old board.
This process allows circuits to be modified or components to be salvaged without damaging surrounding parts or the board itself. It involves heating the solder joint to melt the solder and then removing it from the PCB to release the component.
Desoldering methods vary depending on the size and type of component: hot air is typically used for larger components or Surface Mount Technology (SMT) parts, while a soldering iron works better for smaller components or through-hole parts.
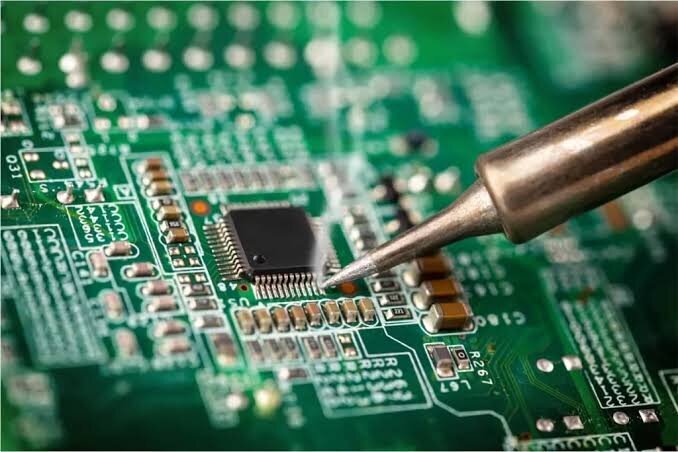
Simple Circuit Boards Desoldering
1. Tool Preparation
Basic Tools:
Temperature-controlled soldering iron: Standard lead-based solder melts at approximately 183–190°C, while lead-free solder melts at 217–227°C; the iron is generally set to 300–350°C.
Solder sucker (desoldering pump): Manual or electric; used to remove molten solder.
Desoldering wick (solder braid): Braided copper wire; ideal for cleaning up residual solder and SMT pads.
Flux: Applying a small amount before desoldering improves heat transfer, prevents oxidation, and allows solder to flow more smoothly.
Tweezers: Pointed tweezers for gripping components; heat-resistant ones are preferred.
Hot air gun: Almost essential for removing SMT components and multi-pin chips.
Auxiliary items: Alcohol, cotton swabs, heat-resistant mat, safety goggles.
2. Safety Precautions:
Soldering iron tips and hot air guns reach very high temperatures; keep them away from electrical cords, skin, and flammable materials.
Solder may splatter during desoldering; wearing safety goggles is recommended.
Electrolytic capacitors can burst when heated; discharge them before removal and pay attention to polarity. Ensure good ventilation and avoid inhaling flux fumes.
3. Desoldering Through-Hole Components
Through-hole component leads pass through the circuit board; common examples include resistors, capacitors, pin headers, and sockets.
Method 1: Solder Sucker Method (Most Common)
Coat the soldering iron tip with a thin layer of solder to improve heat transfer.
Touch the iron to both the solder joint and the lead simultaneously; heat for 1–2 seconds.
Once the solder melts, remove the iron and immediately position the solder sucker over the joint, then press the release button.
Check if the lead is loose; repeat the process if solder residue remains.
Gently pull out the component once all leads are cleared.
Method 2: Desoldering Braid/Wick Method (Suitable for small amounts of residual solder)
Apply a small amount of flux to the solder joint.
Place the desoldering braid over the joint and press the soldering iron onto the braid to heat it.
The molten solder is absorbed by the braid; remove the iron and the braid.
Trim off the used section and repeat until the joint is clean.
Method 3: Heating and Tweezers (Suitable for single leads or small components)
Heat the solder joint with the iron until the solder melts.
Simultaneously use tweezers to gently pull out the lead.
If a lead is bent, heat it and straighten it with a small tool before removal.
Multi-pin Through-Hole Components (Pin headers, IC sockets):
Clear solder from each pin individually using a solder sucker, then gently pry the component loose.
Alternatively, use a hot air gun to heat the entire component, but ensure surrounding plastic parts can withstand the temperature.
If a lead sticks to the pad, add fresh solder to aid heat transfer, then remove the solder.
4. Desoldering Surface Mount (SMD) Components
SMD components are soldered directly onto pads; removal requires a hot air gun or specialized techniques.
Method 1: Hot Air Gun Method (Recommended)
Apply flux around the component.
Set the hot air gun to 300–350°C with low-to-medium airflow.
Hold the nozzle 2–3 cm away from the component and heat evenly; do not focus on a single spot.
Once the solder melts, gently remove the component with tweezers.
Clean residual solder from the pads using desoldering braid.
Method 2: Dual Soldering Iron Method (Suitable for small SMD resistors and capacitors)
Touch the solder joints at both ends of the component simultaneously with two soldering irons.
Once the solder melts, use tweezers to remove the component.
If two irons are unavailable, you can detach one end first, followed by the other.
Method 3: Desoldering Braid and Soldering Iron (Suitable for SMDs with few pins)
Apply flux and use desoldering braid to remove the solder from one end.
Repeat the process for the other end, then remove the component.
Multi-pin SMD ICs (SOP, QFP, etc.):
A hot air gun is the best choice; heat evenly in a circular motion, and lift the component vertically with tweezers once the solder has fully melted.
Alternatively, use the "solder pooling" method: bridge all pins with a large amount of solder, heat the entire solder mass, and then remove the component.
After removal, clean the pads with desoldering braid and check for short circuits.
Mastering desoldering techniques is not only useful for maintenance but is also an essential skill for anyone working in the electronics industry. Learning to properly desolder circuit boards enables you to easily handle simple solder bridges in beginner projects or perform precise rework on dense, multi-layer circuit boards. With the right tools, controlled heating methods, and proper technique, you can easily remove components from a PCB without damaging the board or the components themselves.